
Google AdSense Auto Ads is a powerful feature that uses machine learning to automatically place and optimize ads on your website. This not only saves you time but also helps maximize your revenue by determining the best ad placements and formats. In this guide, we’ll walk you through the steps to set up Auto Ads on your website.
Step 1: Log In to Your Google AdSense Account
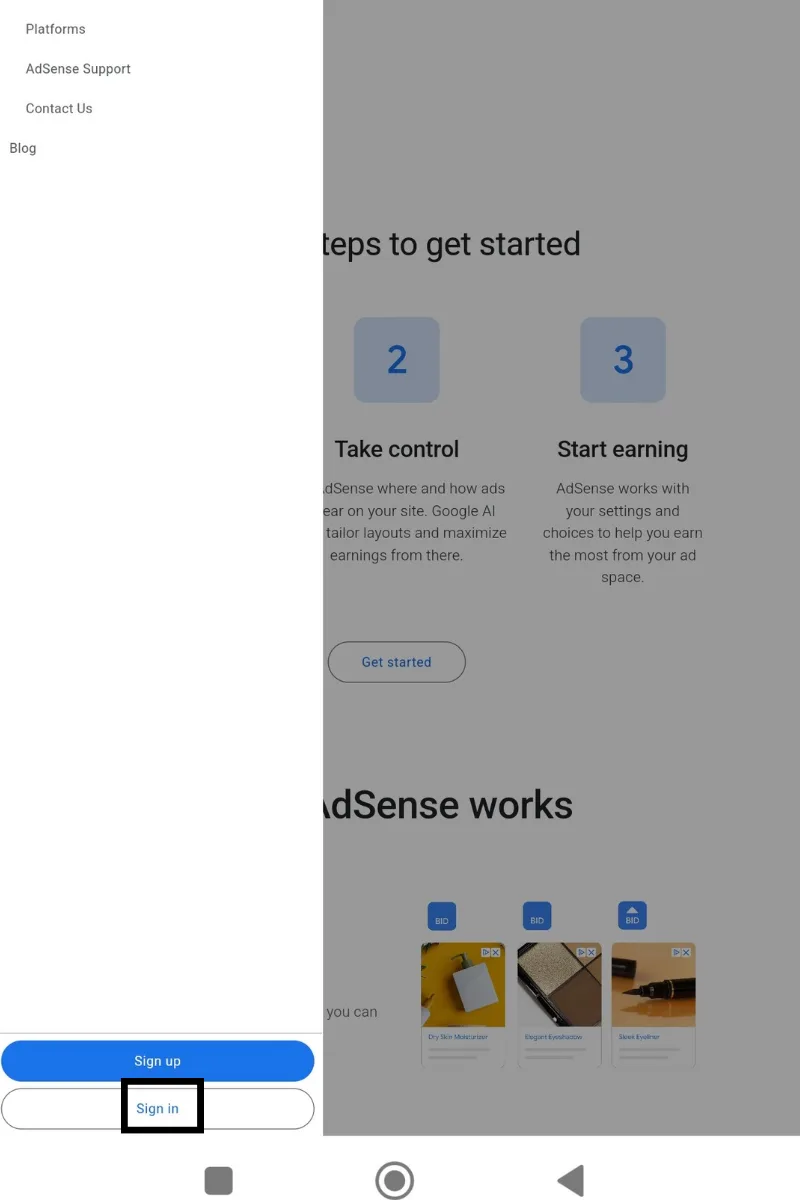
- Go to Google AdSense.
- Log in using your Google account credentials.
Step 2: Access the Auto Ads Section

- Once logged in, click on “Ads” in the left-hand menu.
- Select “By site” from the dropdown menu.
- You’ll see a list of websites associated with your AdSense account.
Step 3: Choose the Website for Auto Ads
- Locate the website where you want to enable Auto Ads.
- Click the “Edit” icon (a pencil symbol) next to the website’s name.
- If your website is not listed, you’ll need to add it first by clicking “Add site” and completing the verification process.
Step 4: Configure Auto Ads Settings
- After selecting your website, turn on the “Auto ads” toggle.
- Customize the types of ads you want to display:
- Anchor Ads: Sticky ads that appear at the top or bottom of the screen.
- Vignette Ads: Full-screen ads that appear between page loads.
- In-page Ads: Ads placed within the content.
- Matched Content: Promotes related articles from your site (if eligible).
- Multiplex Ads: A grid of ads with a native look.
- Use the preview tool to see how Auto Ads will appear on your website.
Step 5: Get the AdSense Code
- Navigate back to the “Ads” section and click on “Get code” if you haven’t already added AdSense to your site.
- Copy the generated code snippet.
Step 6: Add the AdSense Code to Your Website
To enable Auto Ads, you need to insert the AdSense code into your website’s HTML.
For WordPress Users:
- Install a plugin like Insert Headers and Footers or use your theme’s built-in settings.
- Paste the AdSense code into the section of your site.
- Save the changes.
For Non-WordPress Sites:
- Access your website’s HTML file via your hosting platform or CMS.
- Paste the AdSense code just before the closing tag.
- Save the file and upload it back to your server.
Step 7: Verify Ad Placement and Monitor Performance
- It may take up to 24 hours for Auto Ads to start appearing on your website.
- Use the AdSense dashboard to monitor performance and revenue.
- Experiment with settings to fine-tune the user experience and maximize earnings.
Benefits of Auto Ads
- Efficiency: Automatically scans your site and finds optimal ad placements.
- Revenue Maximization: Adjusts ads dynamically to increase impressions and clicks.
- Ease of Use: Saves time by eliminating the need for manual ad placement.
- Mobile Optimization: Ensures ads display correctly on all devices.
Tips for Best Results with Auto Ads
- Balance Ads and Content: Avoid overwhelming users with too many ads.
- Enable Responsive Ads: Ensure they adjust seamlessly across devices.
- Test and Monitor: Continuously review analytics to optimize ad performance.
Conclusion
Enabling Google AdSense Auto Ads is a simple and effective way to optimize ad placement on your website. By following this step-by-step guide, you can quickly set up Auto Ads and let Google’s algorithms do the heavy lifting. The result? More time to focus on creating great content while enjoying a steady stream of ad revenue.